Griffith Build Log
- darkesttears
- Jun 28, 2020
- 6 min read
Updated: Jun 11, 2022
Hello!
Today I'm posting a short and sweet build log for the casual version of Griffith from Berserk. Love him or hate him, his design is appealing and a good choice for a casual costume. I do love his armour aswell, but for the time being I'm working through my backlog and not planning any gigantic additional armours until it's done. Personally I'm a huge fan or Berserk and I can't recommend enough to read this manga if you haven't already.
I did some of this costume in preparation for a makeup stream that I had on my instagram, and after that I finished up the remaining parts. I had all the materials and wig for this costume at home prepared already since I was originally intending to wear it last year (2019) with a friend as Caska. So I'm glad I finally got it done!
The build itself was very fast given that it's as aforementioned a simpler casual costume, so it took me a little less than a week in total to make it. My choice of materials are linen fabrics for the shirt and pants, fimoclay to sculpt the behelit, 5mm high density EVA foam for the blade and handle of the sword, worbla to sculpt the "dome" handguard, 2mm EVA foam for the part of the handguard going from the dome to the bottom, pizza cardboard for the sheath covered in 2mm eva foam and leather for the belt. Also some eyelets, metal curtain rings, belt buckles and studs. The boots are bought secondhand.
So first up I started the patterns for the shirt and pants using my yellow mock-up fabric.


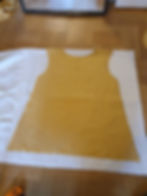
These are the patterns for the shirt. I took my fabric and folded it twice so I only had to draw one side of the design. The reason for doing this is so that I don't have a seam up by the shoulders, similar to how I did my Inuyasha patterns way back. It's also a very easy way to make sure that the front and back lines up properly (hopefully).


Here you can see clearly the fold up in the shoulders, and then how the shirt looks when I've only pinned the sides. I also put the slit in the front by the neck so I knew what was front and back.


After that I moved on to the sleeves with two square/rectangle patterns. One for the main part of the sleeve, and one for the puffy edge. I used a similar method here with folding the fabric so I knew all the sides would be equal, measured an aproximate measure of how large the holes for the sleeves on the main body is and cut the square/rectangles.


After that I measured the length I wanted for the pants outer side and drew a simple pant shape/pattern with the fabric folded so I would get two identical parts. When I was happy with my patterns I moved on to the actual fabric, pictured here is the pattern for the shirt about to be transferred onto the white linen. I had the fabric folded while drawing it so I'd get the same no-seam shoulders on the actual shirt.

And here we have the pattern for the pants transferred onto the dark grey linen. After I cut everything I for some reason felt the need to iron everything (normally I don't because I'm lazy and don't care) and the pants turned out extremely... crisp. Like, stiff dress trousers which made them look hilarious when trying them on.


The pants before and after adding hems and elastic in the waist. They are oversized and puffy and work perfectly for "medieval" (historically people didn't really wear baggy pants in medieval times but that's a whole other topic) fantasy pants. Other than that, the pants are sewn with zig-zag stitch on the edges and then sewn together with a normal straight stitch, nothing special.


In order to get the puffy edges be puffy for the shirt I used a method that I don't really know the name of, but it's a handy and common way to add "puff" to your projects. You sew a very long and loose stitch (preferrably two stitches next to each other but depends how stressed on time you are) and then pull the thred to scrunch it up into tiny little bunches. I do apologize that this is white on white so it's probably a little hard to see, I may go more in depth about that in a separate post.


After I was happy with the amount of puff and properly evening out the amount around the edges, I added them to the sleeve and tested so I could get my arm through them.


And here's how it looks all put together! After this I sewed the sleeves onto the main body and got started with the hems. The hems are handstitched because I wanted a neater look than what I'd be able to achieve with my sewing machine.


All the hems for the shirt are simple folded hems, handstitched with a regular straight stitch, nothing fancy.

Here's how it looked together somewhere mid-progress before hems etc.
Additional things I did but don't have photos of was to add the eyelets to the slit of the shirt and put a string through.
As for the behelit, I sculpted it in red fimo clay and then painted it with a red acrylic aswell to get a more cohesive colour and shine to it. The final details was to screw in a hoop for the string to go through, and paint a little black for details like the nostrils, mouth and eyelids.

Behelit after adding red acrylic paint, before adding black details.
Last but not least we have the sword + sheath and the belt. Let's start with the sword.


One night I got a bit of feeling and drew up a bunch of swords for other characters, including Griffith. The pattern for his blade is the one furthest to the left on the pattern part. After transferring the blade pattern onto the foam I cut out additional pieces for the hand grips and glued that onto the larger blade base so that the part that is for the blade goes all the way through to the handle.


After everything was cut and glued together, I dremeled down the edge of the blade and the handle, and covered the blade in Worbla and a little up on the handle. Then I struggled a lot to get it nice and even while the worbla hardened (so it wouldn't look like a funky banana shaped blade).


To create the handguard I took the smallest of my acrylic plastic domes and shaped worbla around it to create a good shape. I then drew the design onto the worbla and added edge detailings in 2mm foam (not pictured).
Some additional things about the sword that isn't pictured was adding the other 2mm foam bit that goes from the handguard to the bottom of the handle, and doing hotglue dots for the texture of the entire handguard, as well as priming the entire sword with woodglue. I used hotglue to attach the handguard to the sword, and the final detail before painting was wrapping the handle with 2mm foam to mimic leather.

To make the swordsheath I took pizza cardboard boxes and taped them together, then I glued 2mm foam onto that and added additional details and painted it up. I watched a tutorial on youtube for how to make this simple method and changed it a little so it would look the way I wanted it to. If you want to check it out for yourself here's the link: https://www.youtube.com/watch?v=LmMguYkgupw
Finally, the belt. I made this in genuine leather (since I have hoarded a lot of genuine leather over the years for other projects). Belts are simple to make, you measure how long you want it to be and then cut it to length and width, add a buckle and it's pretty much done. Griffith's belt has some additional bits and details and the design is not just one solid belt going all around his waist.


An important part for me with leatherwork is to make the edges look neat. When you just cut them you'll be left with a very sharp hard edge, and so "shaving" them down makes the end result look much nicer.


The tool I use for that is this neat little "fork" thingie which in swedish is called a "kantjärn", I've no clue what it's in English sadly. You push it across the edges and shave them, it can't be used to make patterns straight on leather (you use another type of tool for that).

Here's the finished belt assembled before punching the holes to make it wearable (where the belt buckle pins go).
Of course there was some work to the wig aswell, but nothing major. I trimmed the fringe and made it slightly more poofy than how it was coming straight out of the package. I chose a silver/white wig instead of a pure white, because in my opinion pure white wigs don't look very natural. Of course for some characters it's appropriate, but for Griffith and given the source material I wanted more of a realistic touch to this entire costume.
That's about it for this build log, I'm shortly going to post a dedicated album on the actual website with the proper photos from mine and Allion's shoot. (link is here when it's up).
As usual if you have any questions or wonder anything about this build, feel free to ask!


